Tuesday, November 6, 2012

No Cost Day Volume 1

Crafting is a passion of mine. That doesn't mean I'm good at it. You might not want my crafts hanging in your house, but hey, they are good enough for mine. A lot of the time I like to try to use things I already have around my house to make my crafts. Plus, my husband would kill me if I spent all kinds of money on my crafts.

So, every once in while I plan to share a craft I made using nothing but things around our house.

Today's craft is simple, but not very simple to make I found out. I just wanted to make some of those nice wooden letters that you can find in any craft store, but I couldn't bring myself to pay over a $1 a piece for them at Hobby Lobby. I decided to make them myself using some leftover plywood in our storage room.

So, I grab the plywood and my jigsaw and went to work. When I was done, I sanded them, painted them, and put them up in my son's room.

Cost: $0
Time Spent: 3-4 hours
Worth it?: Not so sure, don't think I'll make them again


Monday, October 29, 2012

Bibical Womanhood

I recently watched this video on Godtube. What do you think of the term Biblical Womanhood? Do you agree with this young lady? Interesting.


Would You Do This? Woman Lives Biblically for 1 Year from sharethemessage on GodTube.

Wednesday, October 10, 2012

A New Fall Look

I'm really surprised I accomplished this before the Christmas season made it to my house, BUT this week I finally made a fall wreath to hang on our front door. I had bought the supplies over a month ago, but life happened and the wreath didn't.  Well, yesterday I determined I WAS going to put it all together. All it took was a little time and a lot of burnt fingers from the hot glue.

My Supplies:

 - an old foam wreath that I had already used once to make another wreath
 - some fall colored yarn
 - two bags of super cute acorns from Hobby Lobby(Used my 40% coupon on them)
 - package of twigs from the dollar store
 - cute fall wired ribbon from the dollar store


Directions:

1. I wrapped the foam wreath with the fall colored yarn. (This was a time consuming task. Maybe it was just because I didn't know what I was doing, but Hey, the people on pinterest can wrap a wreath with yarn so so can I.)

2. Next, I hot glued twigs all over the front of the wreath. (This is the step that hurt the most! Hot Glue you are my enemy.)

3. Next, I strategically placed my cute acorns and pinecones(that came in the same package) all over the wreath and hot glued them down.

4. Finally, I threw a bow on top using the fall ribbon I found at the dollar store and hung it from my front door.

Now I am ready for fall! And even finished before Christmas!

Sunday, September 16, 2012

The Big Red Barn

One of Elijah's favorite books is "The Big Red Barn" by Margaret Wise Brown, so when my husband brought home a giant cardboard box what else is there to make but a "BIG RED BARN"! So, I set out to create. First thing's first, I'm not very imaginative, so I need to find someone that has done this before. This lead me to the following:

(Click on Picture to go to Site)
via Living Locurto

Now that I had an idea in my head, it was time to start.

Step 1: Cut off the bottom of your box or open up the bottom of your box and hot glue all the corners together. This will make your box taller and is what I did.

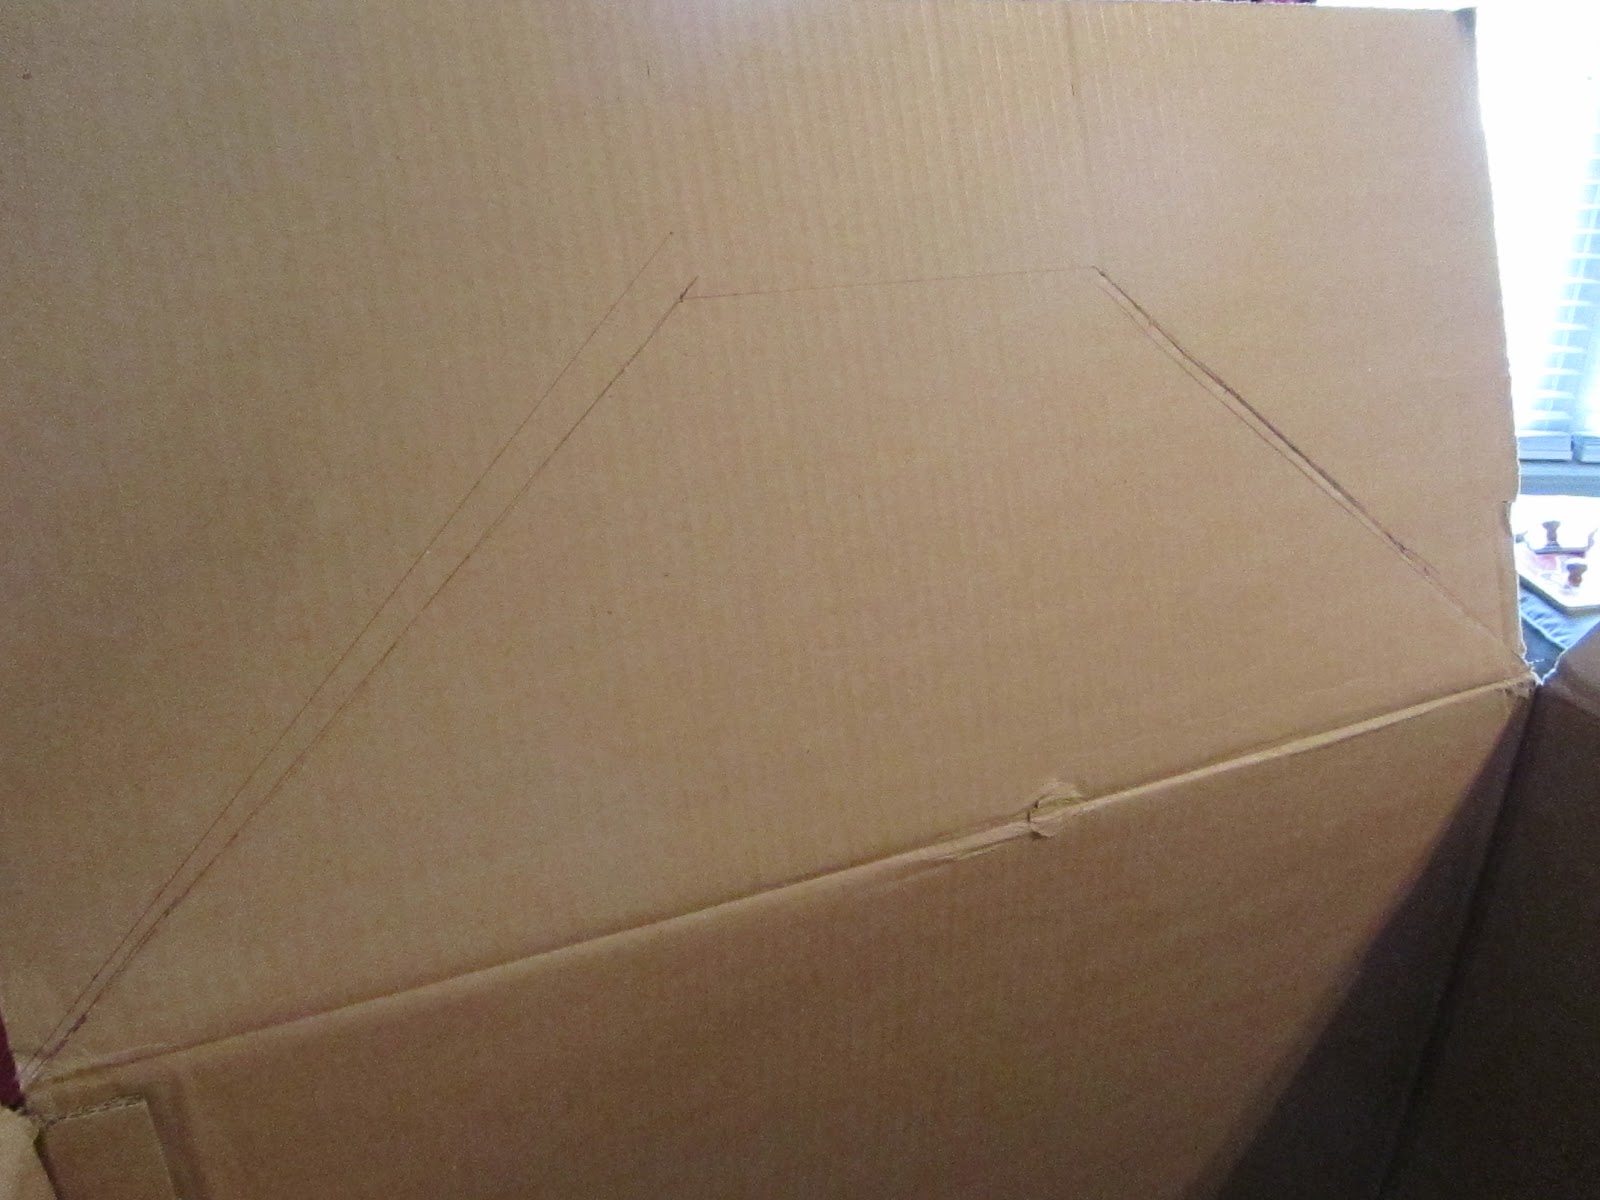
Step 2: Decide what two sides will be your front and back. Draw the design on your barn top on the front and back pieces. I did this by folding in one of the side pieces to my desired angle and drawing a line where the side and front piece met. Then I measured off my angle and transferred those measurements to the other side of my front and to the back piece of cardboard. ( I hope that makes since. I'm not a math person and am not good at explaining math.) Then I cut out the shape of the front and back of the barn.


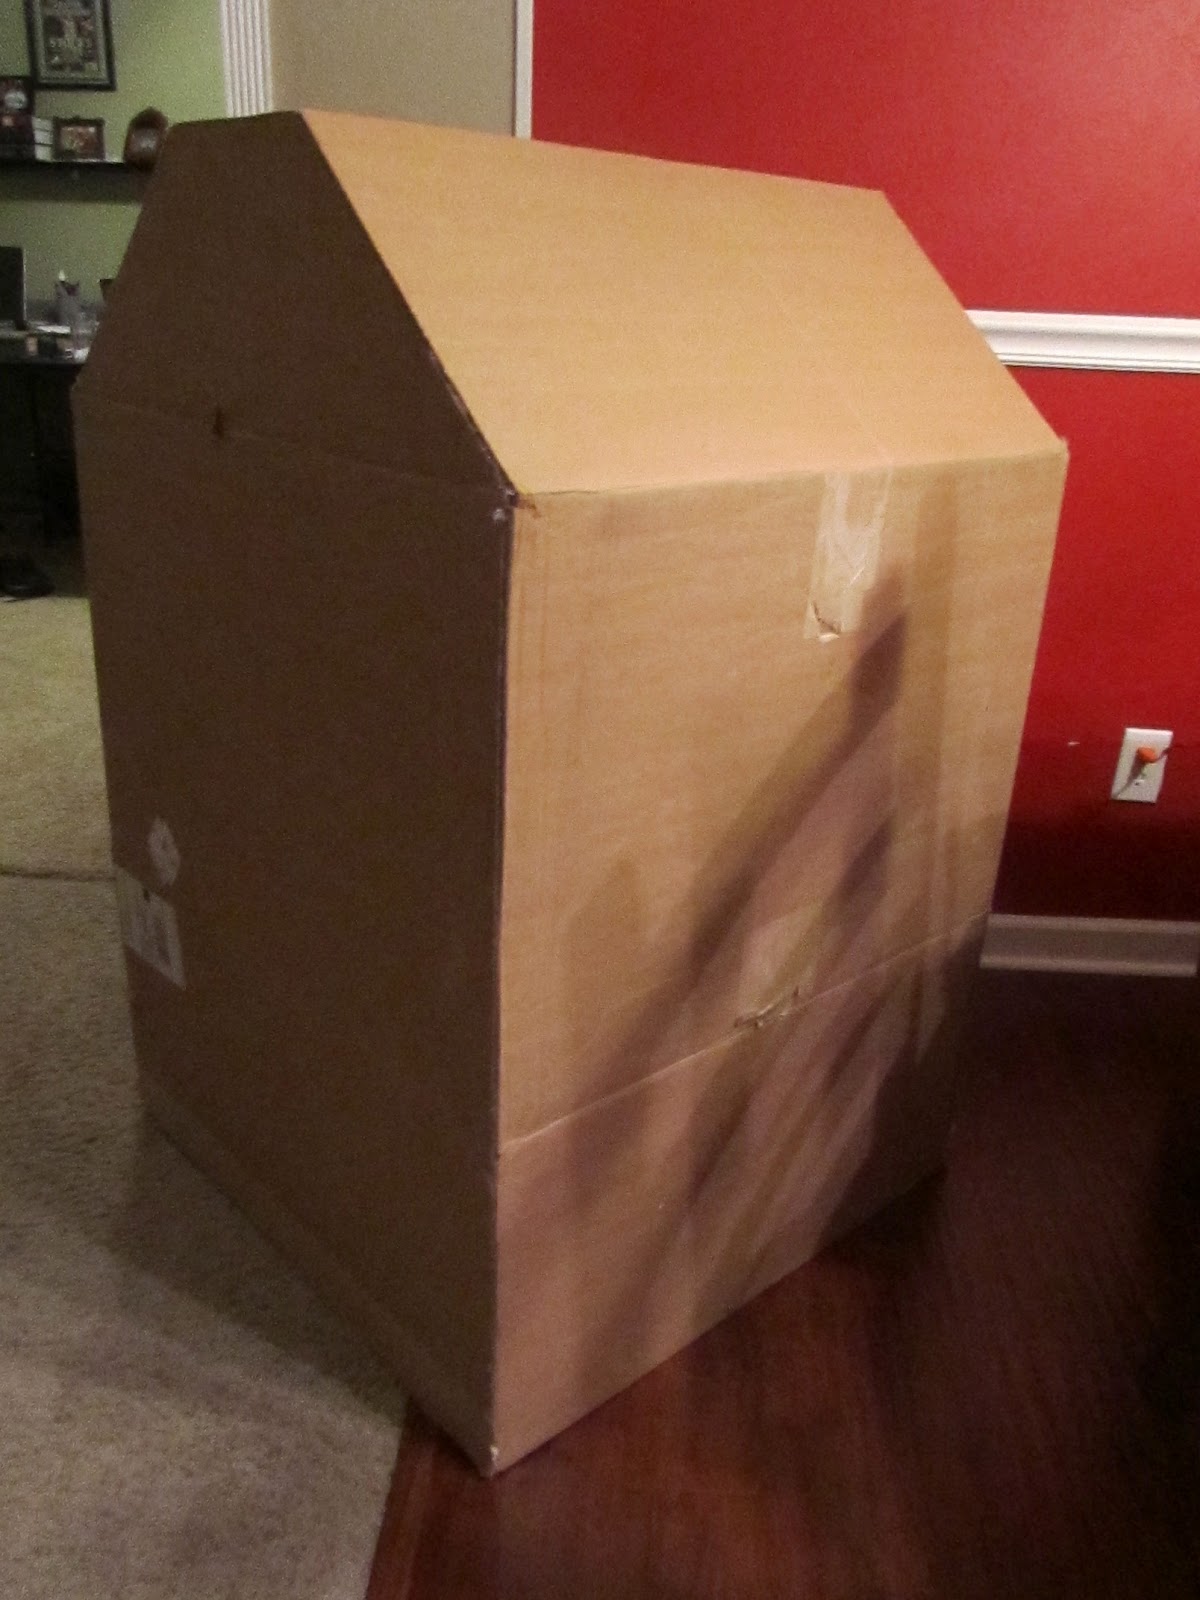
Step 3: Assemble the top of your barn by hot glueing the sides to the front and back pieces. This is going to leave you with a hole at the very top.


Step 4: Measure your hole and use an another piece of cardboard to fill the gap. If you cut off the bottom of your box, you could use one of those pieces.


Step 5: Now it is time to cut out all your designs. My barn is going to have a door and a window. On the door, I cut off a strip of cardboard on the bottom so the door would open and close smoother.


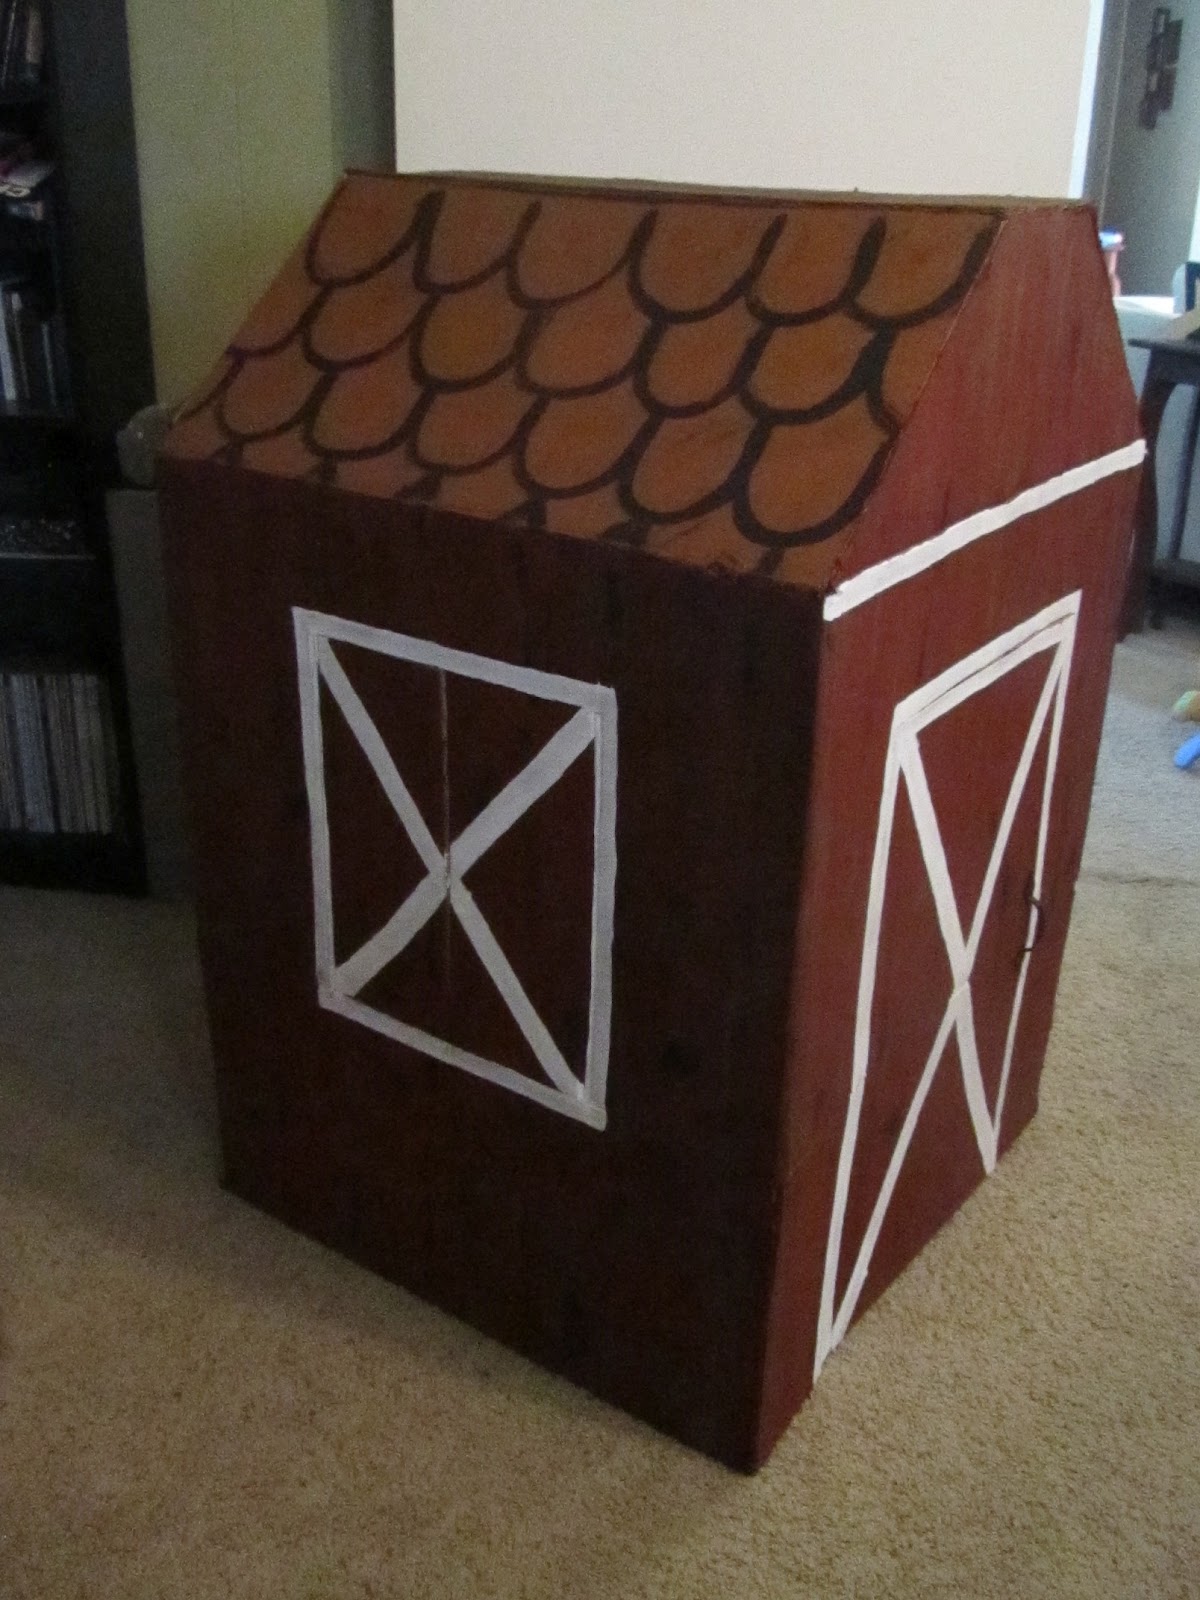
Step 6: Here comes the fun part, PAINTING! I love to paint! For the barn's body, I painted it completely red. Then I went back with a dry brush and very lightly brushed on some black paint to give it a real feeling. Finally, I used dry brushes to paint light brown and black stripes to create the allusion of boards and knots in the wood.


Step 7: For the roof, I painted it completely brown. Then I created shingles using black paint. I also dry brushed some black in the shingles. 


Step 8: My last step, was to take white paint and create the outline of the door and window. Oh, yeah, I also went to Lowe's and bought a really cheap rustic door handle for the door.  Elijah LOVES to go inside his barn, shut the door, and have you knock on the door! Super fun!


(After my son played with it for a while, I went back and cut out a tunnel hole on the other side of the barn. I also added a handle on the inside of the door, a cardboard horseshoe on the front, and a weathervane on the top.)


Tuesday, August 28, 2012

The Story of the Tree

When we moved into our house 10 years ago, there was a huge tree in the backyard. You know of those trees that might have been here before the founding fathers. Since the day we moved in, we have had a love/hate relationship with this tree. We loved the tree itself, how beautiful and old it was and how it shaded the whole backyard. We hated the fact that NO grass would grow in our yard due to the amount of nutrients the tree was sucking from the soil.

Well, about 5 years ago, our tree started its slow death. It had split in two locations and was starting to rot. We would listen to it creak and moan whenever the wind blew. We knew the day that tree decided to split and fall would also be the day we would lose our house. So... we got some bids and destroyed our neighbors chain link fence, but the beautiful tree was gone.

EXCEPT....

for the about 10 foot stump that was going to cost us $1,000 to destroy, which my husband would not pay. So, for the last 5 years I have looked out my kitchen window at this everyday.

Well, years passed and weather worked on that old stump. In March, it had started to rot pretty good, so my husband and his dad decided they were going to destroy it themselves. Now, my husband likes to do things the hard way. Can we use a chainsaw? NO WAY! (Plus every time we tried to borrow it, it wouldn't work.) So, with an ax in hand, they went to work.


After months of work, with a reprieve due to extremely hot weather, the stump is FINALLY gone.


Now, just fill the hole and I can create another beautiful flower garden, which my husband will love. :)


Thursday, August 23, 2012

Teacher Appreciation


Well, it is time for school to start again!!! For 12 years, I enjoyed teaching everyday. But, last year God blessed my husband and I with an adorable little boy. It was a hard decision, but we chose for me to stay home. That has been the best decision for our family. I’m not saying that I don’t miss teaching everyday, but the joy on my son’s face each morning makes up for it.

I still love my school family, and I feel that it is important for them to know that people appreciate what they do each day. As a way to know they are loved, I like to make them little gifts throughout the year. So, for the beginning of the school year I decided to bake them all cookies. Yes, I did bake enough cookies for 70 people in one afternoon! After the cookies were finished, which took nearly all afternoon, I decorated it all up. The next day, I delivered them to my fellow teachers.

I hope they enjoyed them!


Friday, August 17, 2012

Reason for the Blog

I have spent years reading my friends' blogs, getting great ideas from blogs, and thinking....I should someday start a blog. I am by no means a writer (even though I taught it for 10 years). I can't even really say I enjoy writing, but I love to craft, bake, cook (love is stretching it here), and sew (love is DEFINITELY a stretch here, but I have determined that I will conquer the sewing machine!!!!).

Last year, I became a stay-at-home mom. For a girl that feels the need to constantly be busy, this was hard. How did I remedy the problem? Crafting. Baking, Cooking. Sewing. Anything to help fill the hours I wasn't teaching (some might say playing) with my son.

A few months ago, I completed a bible study on the Proverbs 31 woman. While I am by no means this woman, this is what I want to strive to be in my home. I want my husband to be proud to call me his wife.

So, all this has led to me finally taking the plunge and starting a blog. Will I go weeks, months even, between posts? Probably! (Like most people, I will start out strong and start to fade slowly.) I'm not sure where this blog will lead. I know I want to share things I have made, but you never know what else I might be led to write about. We will see. Join if you would like. We can see how I do at this little thing called writing.